One of the most interesting tech trend of the last year was for sure Augmented Reality. All the big have done something related to it, including Apple. They spent a lot of resources and time dealing with this topic and as Tim Cook said:
…Augmented reality could be the next big thing…
If 2017 was the milestone year for the introduction of a complete framework that deals with AR, the 2018 is for sure the maturity year for this technology following the introduction of ARKit2.
A lot of things have changed in favour of usability, maintanability and simplicity: all things that could help a lot spreading a technology to the mass. The rest of the article is about my personal experience with the new ARKit framework underlining the improvements and differences between iOS11 and iOS12. As any good dev article, we need a case study to deal with in order to better explain the topic. So, here it is.
We will create a simple Application that uses Augmented Reality to show you special offers and additional information when pointing out business cards.
Optionally, the application will load the required information from a remte JSON and then will show to the user the corresponding visual enhancements when needed.
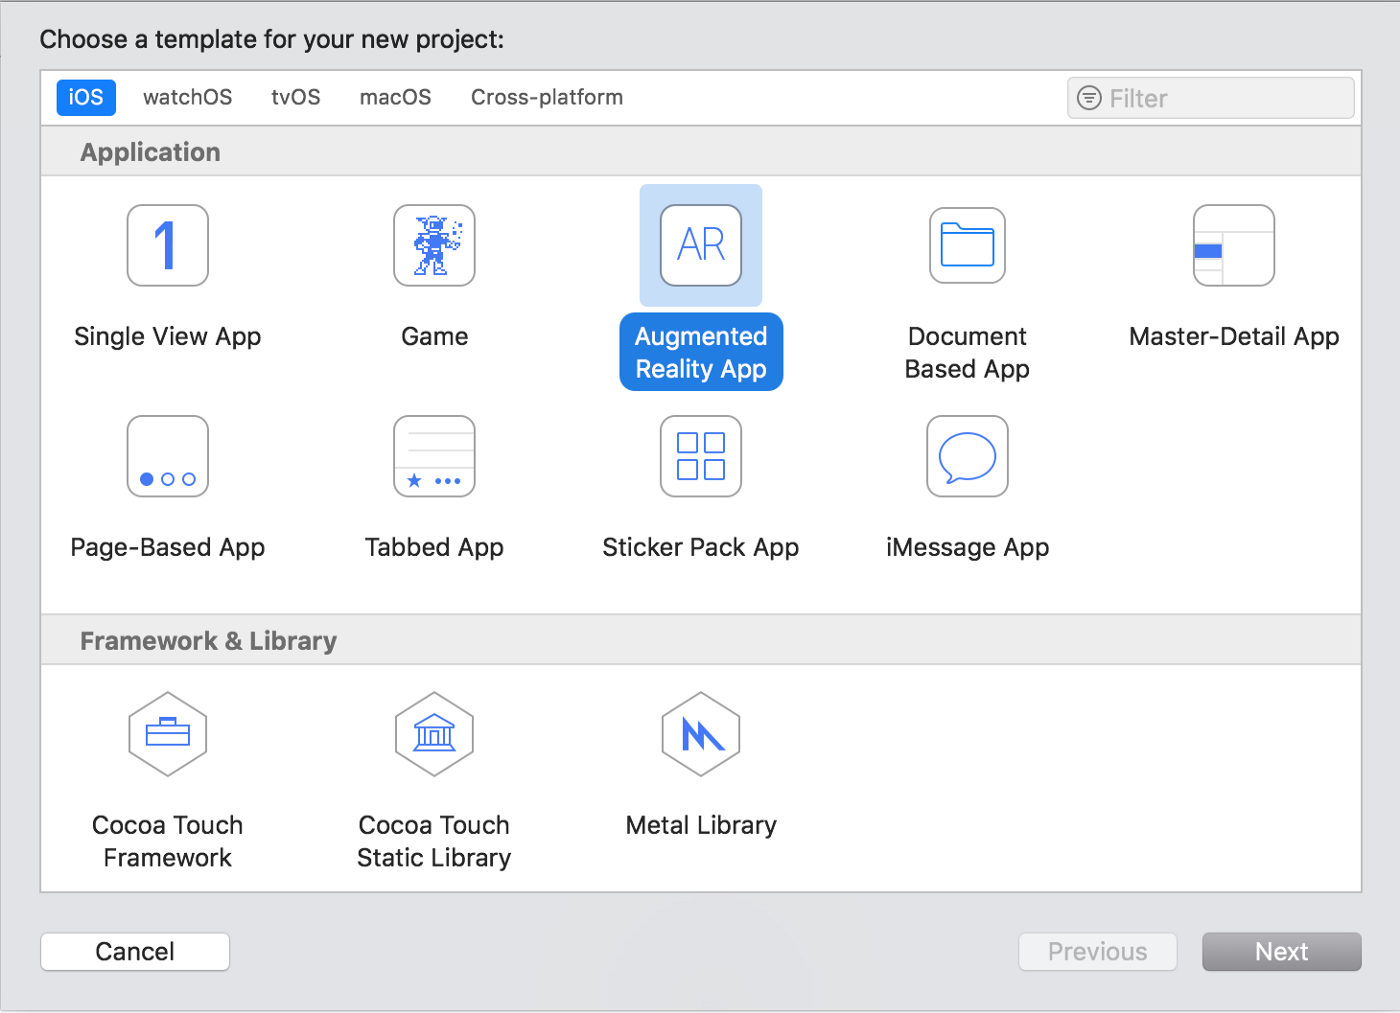
The first thing is opening Xcode and create a new AR project filling all the relevant stuff:
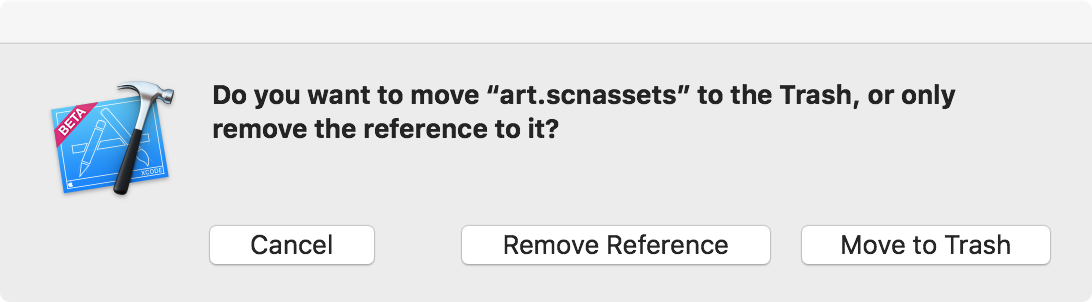
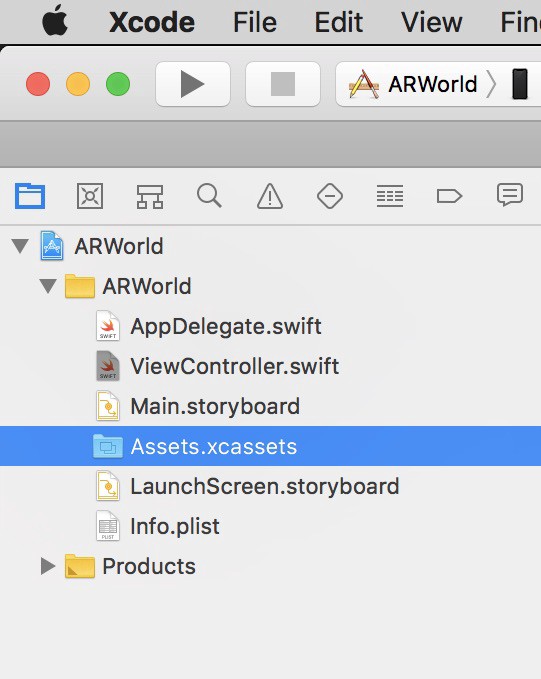
By default, Xcode creates for use a starting scene that is completely useless for the such of this article. Remove it and open the ViewController.swift file automatically created for us.
Since we don’t care anymore about the automatically generated scene, we will modify the viewDidLoad method to reflect this behavior. All that we need is to instruct the sceneView outlet with the right delegate instance as well as some funcy stuff for debugging purpouses.
override func viewDidLoad() {
 super.viewDidLoad()

 sceneView.delegate = self

 sceneView.showsStatistics = true
 sceneView.autoenablesDefaultLighting = true
 sceneView.automaticallyUpdatesLighting = true
}
ARSCNView class is the entry point for any AR app. It mixes virtual contents with the real word seen throught the camera device. It is also responsible for many other really interesting stuff like mapping touches to real world coordinates. ARSCNView relies on a delegate approach. By implementing its ARSCNViewDelegate, we can add virtual contents to any real object that is automagically detected by ARKit.
As you may guess ARKit is the framework responsible for Augmented Reality. In order to work, it should be correctly initialized first. Let’s add a method to do it:
func resetTrackingConfiguration() {
    guard let referenceImages = ARReferenceImage.referenceImages(inGroupNamed: "Photos", bundle: nil) else { return }

  var configuration:ARConfiguration!
    if #available(iOS 12.0, *) {
        configuration = ARImageTrackingConfiguration()
        (configuration as! ARImageTrackingConfiguration).trackingImages = referenceImages
        (configuration as! ARImageTrackingConfiguration).maximumNumberOfTrackedImages = referenceImages.count
    } else {
        configuration = ARWorldTrackingConfiguration()
        (configuration as! ARWorldTrackingConfiguration).detectionImages = referenceImages
    }

    let options: ARSession.RunOptions = [.resetTracking, .removeExistingAnchors]
    sceneView.session.run(configuration, options: options)
}
The resetTrackingConfiguration method is responsible to create and return a correctly working ARSession instructed by an ARConfiguration.
ARSession is a singleton shared object that manages the device camera as long as the device motion sensors to give us a full augmented experience of real life. Camera movements are melted down with camera tilt and shift sensors as well as other sensors, in order to give a quick and consistent orientation of the artificial world into the application. ARSCNView instance created for us by storyboard contains already a reference to the default shared ARSession, so we don’t care about initializing it. Instead, we need only to create a valid ARConfiguration.
ARConfiguration is an abstract class and we don’t deal directly with it. Instead, we will use istances of ARWorldTrackingConfiguration and ARImageTrackingConfiguration that are implementation of the former one. There are other implementations that deals with tracking the device orientation only (AROrientationTrackingConfiguration) and faces and facial expressions (ARFaceTrackingConfiguration) but they are not relevant for this discussion.
ARWorldTrackingConfiguration is the main class available for World-tracking session. Firstly introduced with iOS11, it can detect and track a lot of interesting elements in our real world, including 3d objects, infinite planes and 2d images. The former one is interesting for our topic; however, iOS12 introduce a brand new specialization for the ARConfiguration abstract class named ARImageTrackingConfiguration.
As its predecessor it is able to track 2d images but with a lot improvements such as real time tracking and automatic handling when the image disappears from view. We will come back to this topic in a few moments.
Since we would like to support both iOS11 and iOS12 for a comparative performance, we need to go in deep with custom configurations for both ios versions. If is available iOS12 we will use the new ARConfiguration implementation:
if #available(iOS 12.0, *) {
 configuration = ARImageTrackingConfiguration()
 (configuration as! ARImageTrackingConfiguration).trackingImages = referenceImages
 (configuration as! ARImageTrackingConfiguration).maximumNumberOfTrackedImages = referenceImages.count
}
otherwise we will use the standard one:
else {
 configuration = ARWorldTrackingConfiguration()
 (configuration as! ARWorldTrackingConfiguration).detectionImages = referenceImages
}
in both cases we will instruct the shared session to use the crafted configuration for the rest of the discussion:
let options: ARSession.RunOptions = [.resetTracking, .removeExistingAnchors]
sceneView.session.run(configuration, options: options)
Now that we have correctly configured the ARSession, we need some images to use against the ARCamera tracking engine. Select the Assets onto your project:
and right click on the left side, creating a new AR Resource Group:

Name it Photos and add some cards to it. Here the most important thing is to add the relative estimated dimensions for each card. It is important since the 3d engine need this information to estimate correctly the object in the 3d world.
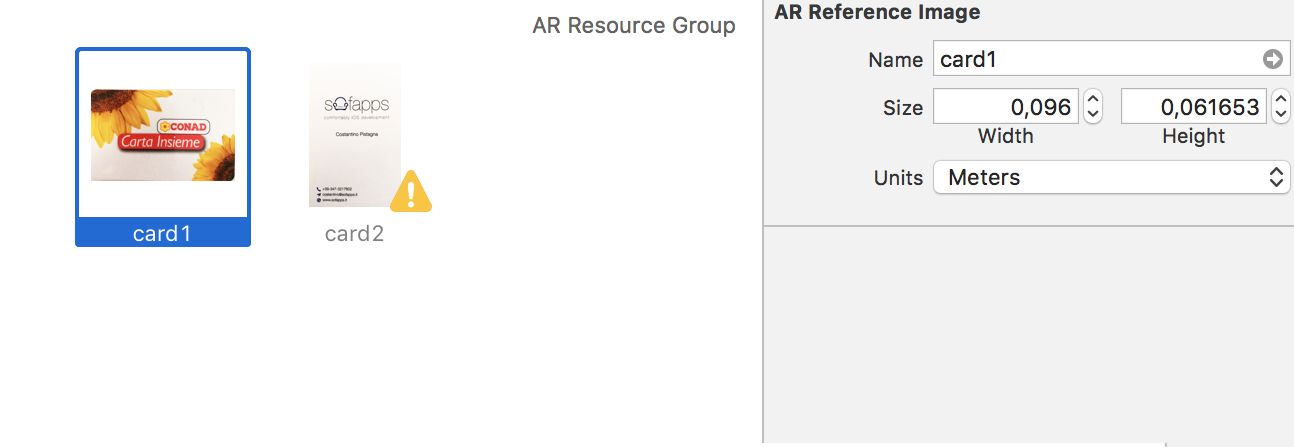
As you may notice one of the card has a warning signal. Let click on it:
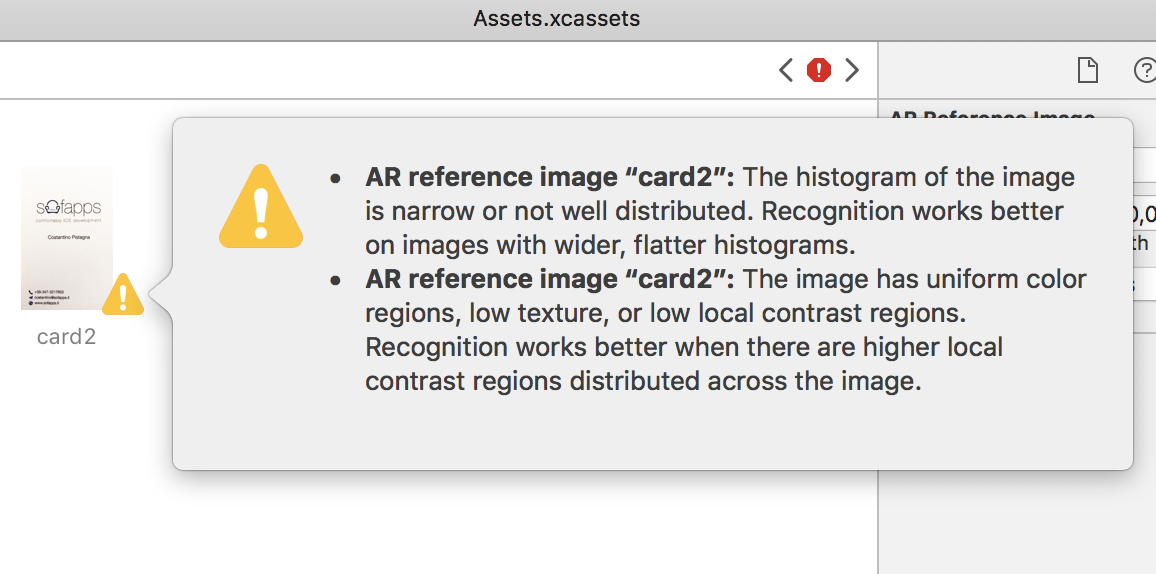
Xcode is warning us that the histogram and constrasts on the card is not optimal for image recognition. Lets ignore it for the moment.
Our toy app should be able to track 2D images and map them to real world objects by using anchors. An ARAnchor is the class responsible for real-world position and orientation, mapping the detected object in an AR scene. Along with other interesting properties it contains a matrix_float4x4 used for defining the anchor’s rotation, translation and scale in world coordinates.
open var transform: matrix_float4x4 { get }
When used along side with ARWorldTrackingConfiguration or ARImageTrackingConfiguration, ARKit creates automatically for us the relative anchors as long as a match with our reference images is found in the scene. All we have to do is implemeting the relative delegate, in order to add the corresponding object in the form of SCNNode to the new anchor.
func renderer(_ renderer: SCNSceneRenderer, nodeFor anchor: ARAnchor) -> SCNNode? {
    if let imageAnchor = anchor as? ARImageAnchor {
        let node = SCNNode()
        node.name = anchor.identifier.description
        var labelNode:SCNNode?

        switch imageAnchor.referenceImage.name {
        case "card1":
            labelNode = self.addLabel(text: "Hi, Costantino!\nYour loyalties points are 2032.", anchor: imageAnchor)
        case "card2":
            labelNode = self.addLabel(text: "Last tweet from Costantino:\n#WWDC18 #ARKit2 rocks!", anchor: imageAnchor)
        default:
            break
        }

        if let labelNode = labelNode {
            node.addChildNode(labelNode)

            node.opacity = 0.0

            DispatchQueue.main.async {
                node.runAction(SCNAction.fadeIn(duration: 3.0))
            }

            return node
        }
    }
    return nil
}
SCNNode is the basic lego brick for all AR based apps. It wraps together 3d coords with scene objects such as lights, camera and other displayable contents. As for UIViews, SCNNodes follows a tree hierarchy that allow us to nest them in a fancy way by using simple primitives such as
open func addChildNode(_ child: SCNNode)
open func removeFromParentNode()
renderer:nodeFor: method is called in response to a new detected correspondance between our images dataset and the real world. Since this method is also called in response to any new ARAnchor added to the scene (detected planes, 3d objects and so on) we should test against ARImageAnchor in order to be sure that all things are working right:
if let imageAnchor = anchor as? ARImageAnchor {
   …
}
next, we create a new SCNNode that will contain all the relevant stuff and we switch against the detected image name; this is the main business logic in order to distinguish between images from our dataset.
switch imageAnchor.referenceImage.name {
    case “card1”:
    …
    case “card2”:
    …
    default:
    …
 }
then, if we successfully create a valid node, we add it to the hyerarchy and return the main node:
if let labelNode = labelNode {
 node.addChildNode(labelNode)

 …
 return node
}
to give a professional touch, we would like to add some fadein/fadeout animations to the entire workflow. Since the rederer:nodeFor: is called on the main thread we should async the runAction, in order to be sure that no crappy animations will occur.
DispatchQueue.main.async {
    node.runAction(SCNAction.fadeIn(duration: 3.0))
}
For the more curious
addLabel is a support method used to generate a valid 2D spritekit object. Since we are dealing with 2D tracked images, we would like to add 2d virtual contents on the scene to give the user the feel that additional informations are added just above the real object.
func addLabel(text: String, anchor: ARImageAnchor) -> SCNNode {
    let plane = SCNPlane(width: anchor.referenceImage.physicalSize.width,
                         height: anchor.referenceImage.physicalSize.height)

    let planeNode = SCNNode(geometry: plane)
    planeNode.eulerAngles.x = -.pi / 2

    let skScene = SKScene(size: sceneSize)

    skScene.backgroundColor = UIColor(white: 0.0, alpha: 0.0)

    let substrings: [String] = text.components(separatedBy: "\n")
    for aSubstring in substrings {
        let lbl = SKLabelNode(text: aSubstring)
        lbl.fontSize = 20
        lbl.numberOfLines = 1
        lbl.fontColor = UIColor.white.withAlphaComponent(0.85)
        lbl.fontName = "Helvetica-Bold"
        let y = CGFloat(substrings.index(of: aSubstring)! + 1) * lbl.fontSize
        lbl.position = CGPoint(x: 20, y: y)
        lbl.horizontalAlignmentMode = .left
        lbl.yScale *= -1
        skScene.addChild(lbl)
    }

    let material = SCNMaterial()
    material.isDoubleSided = false
    material.diffuse.contents = skScene
    plane.materials = [material]

    return planeNode
}
We firstly create a SCNPlane with the physycal size of the detected image. SCNPlane is a rectangular 2d plane geometry object responsible to hold our bidimensional text. However, since we are in a 3D world we need to wrap it against an SCNNode.
let planeNode = SCNNode(geometry: plane)
planeNode.eulerAngles.x = -.pi / 2
We should also rotate the resulting planeNode since, by default, they are generated perpendicular to the root. At this point no 2d objects nor text are still created. To accomplish this we need to create a SprikeKit Scene.
SKScene is the counterpart of SCNScene on the 2d world handled by SpriteKit. It represents a 2d scene content and it has nothing to display since, as its 3d paritetic, is merely a wrapper. To generate the 2d text we will use the SKLabelNode. It works quite similar to the UILabel UIKit counterpart: we configure text, font and other parameters in a very straightforward way.
 let lbl = SKLabelNode(text: aSubstring)
 lbl.fontSize = 20
 lbl.numberOfLines = 1
 lbl.fontColor = UIColor.white.withAlphaComponent(0.85)
 lbl.fontName = “Helvetica-Bold”
Sadly, there is no native support for multilines wrapping by using the carriage return (\n) so we need to recreate it by our own. To accomplish this we use a simple string tokenization with the original string as parameter.
let substrings: [String] = text.components(separatedBy: “\n”)

for aSubstring in substrings {
    …
}
The most interesting part here, is how we map the 2d spritekit in the 3d world. To achive this we use the SCNMaterial. SCNMaterial is a class responsible to define the appearance of a 2d geometry when rendered in a 3d world. As of any 3d engine, our SCNScene has lights and materials that respond to it when rendered. We need simply to specify to our SCNMaterial that we would like to use the content of the previously created SKScene as material.
let material = SCNMaterial()
material.isDoubleSided = false
material.diffuse.contents = skScene
isDoubleSided property is set to false, since we don’t care about the backward side of our text. the diffuse property is a SCNMaterialProperty class. It is simply a container for the texture of our material. Fortunately for us it could contains almost anything including a whole SKScene. At the end we instruct our previously generated plane to use the just crafted custom material as source.
plane.materials = [material]
If you have followed all we have done right now and run what we have so far on iOS12, all things will work like a charm and you will be delighted by an impressive and accurate 2d tracking. However, if you run the same code on iOS11 you will be disappointed about poor tracking performances.
Moreover, there is a really crappy bug that leave the detected 2d images on the 3d world for ever. If you recall, at the very beginning of this article I said that
one of the most interesting new features of ARImageTrackingConfiguration is related to the new handling capabilities with disappeared objects from the screen.
Since we don’t have such things on iOS11 we need to create a workaround by ourself. We will use a private struct to hold all the required information:
struct SANodeAnchor {
 var date:Date
 var node:SCNNode
 var anchor:ARAnchor
}
declaring it as a private array on our ViewController. We also need a periodic polling of the scene, in order to purge trashed objects
private var lastUpdate = [String:SANodeAnchor]()
private var scheduledTimer:Timer?
our viewDidAppear method will be responsible to define the above timer
override func viewDidAppear(_ animated: Bool) {
    super.viewDidAppear(animated)

    if #available(iOS 12.0, *) {

    }
    else {
        if let scheduledTimer = scheduledTimer {
            scheduledTimer.invalidate()
        }
        scheduledTimer = Timer.scheduledTimer(withTimeInterval: 3.0, repeats: true) { [unowned self] (timer) in
            for (_, nodeStruct) in self.lastUpdate {
                if Date().timeIntervalSinceNow - nodeStruct.date.timeIntervalSinceNow > 3 {
                    nodeStruct.node.removeFromParentNode()
                    self.sceneView.session.remove(anchor: nodeStruct.anchor)
                }
            }
        }
    }
}
We only need to refresh the lastUpdate cache array when new or already detected objects are correctly parsed on the scene. For this task, we will use another delegate method of ARSCNViewDelegate:
func renderer(_ renderer: SCNSceneRenderer, didUpdate node: SCNNode, for anchor: ARAnchor) {
    if let identifier = node.name {
        let aStruct = SANodeAnchor(date: Date(), node: node, anchor: anchor)
        lastUpdate[identifier] = aStruct
    }
}
This way even on iOS11 we can successfully stop tracking unwanted 2d objects from the screen.
The complete project is available on Github. As I’m writing a bug is afflicting Xcode10 that prevents using dataset images when deploying to iOS11 devices.
as result, on iOS11 the app will not detect any 2d images when deployed from Xcode10. To workaround this, you should run the above project on Xcode9 when you deploy on iOS11 device, commenting the unknown symbols related to ARImageTrackingConfiguration.
Loading remote datasets
A final note about loading dynamic dataset. The above code rely on a static dataset that we have stored into our dataset. However it could be better to dinamically load the dataset from a remote server. I’ve crafted a really simple JSON example for the purpouse.
[
 {
  "imageURL" : "https://www.sofapps.it/card1.jpg",
  "name" : "card1",
  "width" : 0.096
 },
 {
  "imageURL" : "https://www.sofapps.it/card2.jpg",
  "name" : "card2",
  "width" : 0.058
 }
]
Lets fetch this json from our app:
func loadRemotedataset(fromURL: URL, _ completion: @escaping ([Card]?, Error?)->Void) {
    URLSession.shared.dataTask(with: fromURL) { (data, response, error) in
        if let error = error {
            DispatchQueue.main.async {
                completion(nil, error)
            }
        }
        else if let data = data {
            var retArray = [Card]()
            do {
                if let json = try JSONSerialization.jsonObject(with: data, options: .allowFragments) as? [[String:Any]] {
                    for aRow in json {
                        if let aString = aRow["imageURL"] as? String,
                            let anURL = URL(string: aString),
                            let aName = aRow["name"] as? String,
                            let width = aRow["width"] as? CGFloat
                        {
                            retArray.append(Card(url: anURL, name: aName, width: width))
                        }
                    }
                    DispatchQueue.main.async {
                        completion(retArray, nil)
                    }
                }
                else {
                    throw NSError(domain: "JSON parse error", code: -1, userInfo: nil)
                }
            }
            catch {
                DispatchQueue.main.async {
                    completion(nil, error)
                }
            }
        }
    }.resume()
}
and load the cards dinamically:
func createDataset(_ completion: @escaping ([ARReferenceImage]?, Error?) -> Void) {
    self.loadRemotedataset(fromURL: URL(string: "https://www.sofapps.it/sampleDataset.json")!) { (response, error) in
        if let error = error {
            print("something happened in the way to heaven...", error)
            completion(nil, error)
        }
        else if let response = response {
            var retArray = [ARReferenceImage]()
            for aCard in response {
                let response = URLSession.shared.synchronousDataTask(with: aCard.url)
                if let error = response.2 {
                    print("something happened in the way to heaven...", error)
                }
                else if let data = response.0, let anImage = UIImage(data: data) {
                    var orientation = CGImagePropertyOrientation.up
                    switch anImage.imageOrientation {
                    case .up:
                        orientation = .up
                    case .down:
                        orientation = .down
                    case .left:
                        orientation = .left
                    case .right:
                        orientation = .right
                    default:
                        orientation = .up
                    }
                    if let cgImage = anImage.cgImage {
                        let aReferenceImage = ARReferenceImage.init(cgImage, orientation: orientation, physicalWidth: aCard.width)
                        aReferenceImage.name = aCard.name
                        retArray.append(aReferenceImage)
                    }
                }
            }
            completion(retArray, nil)
        }
    }
}
our resetTrackingConfiguration method should also be adapted to take into account the loading at runtime:
func resetTrackingConfiguration() {
    self.createDataset { [weak self] (referenceImages, error) in
        if let error = error {
            print("oops!, something happened on the way to heaven...", error)
        }
        else if let referenceImages = referenceImages {
            var configuration:ARConfiguration!

            if #available(iOS 12.0, *) {
                configuration = ARImageTrackingConfiguration()
                (configuration as! ARImageTrackingConfiguration).trackingImages = referenceImages
                (configuration as! ARImageTrackingConfiguration).maximumNumberOfTrackedImages = referenceImages.count
            } else {
                configuration = ARWorldTrackingConfiguration()
                (configuration as! ARWorldTrackingConfiguration).detectionImages = Set(referenceImages.map { $0 })
            }

            let options: ARSession.RunOptions = [.resetTracking, .removeExistingAnchors]
            self?.sceneView.session.run(configuration, options: options)
        }
    }
}
At this point the app should work on both iOS11 and iOS12, loading dinamically the dataset content from the server.
-Happy coding!